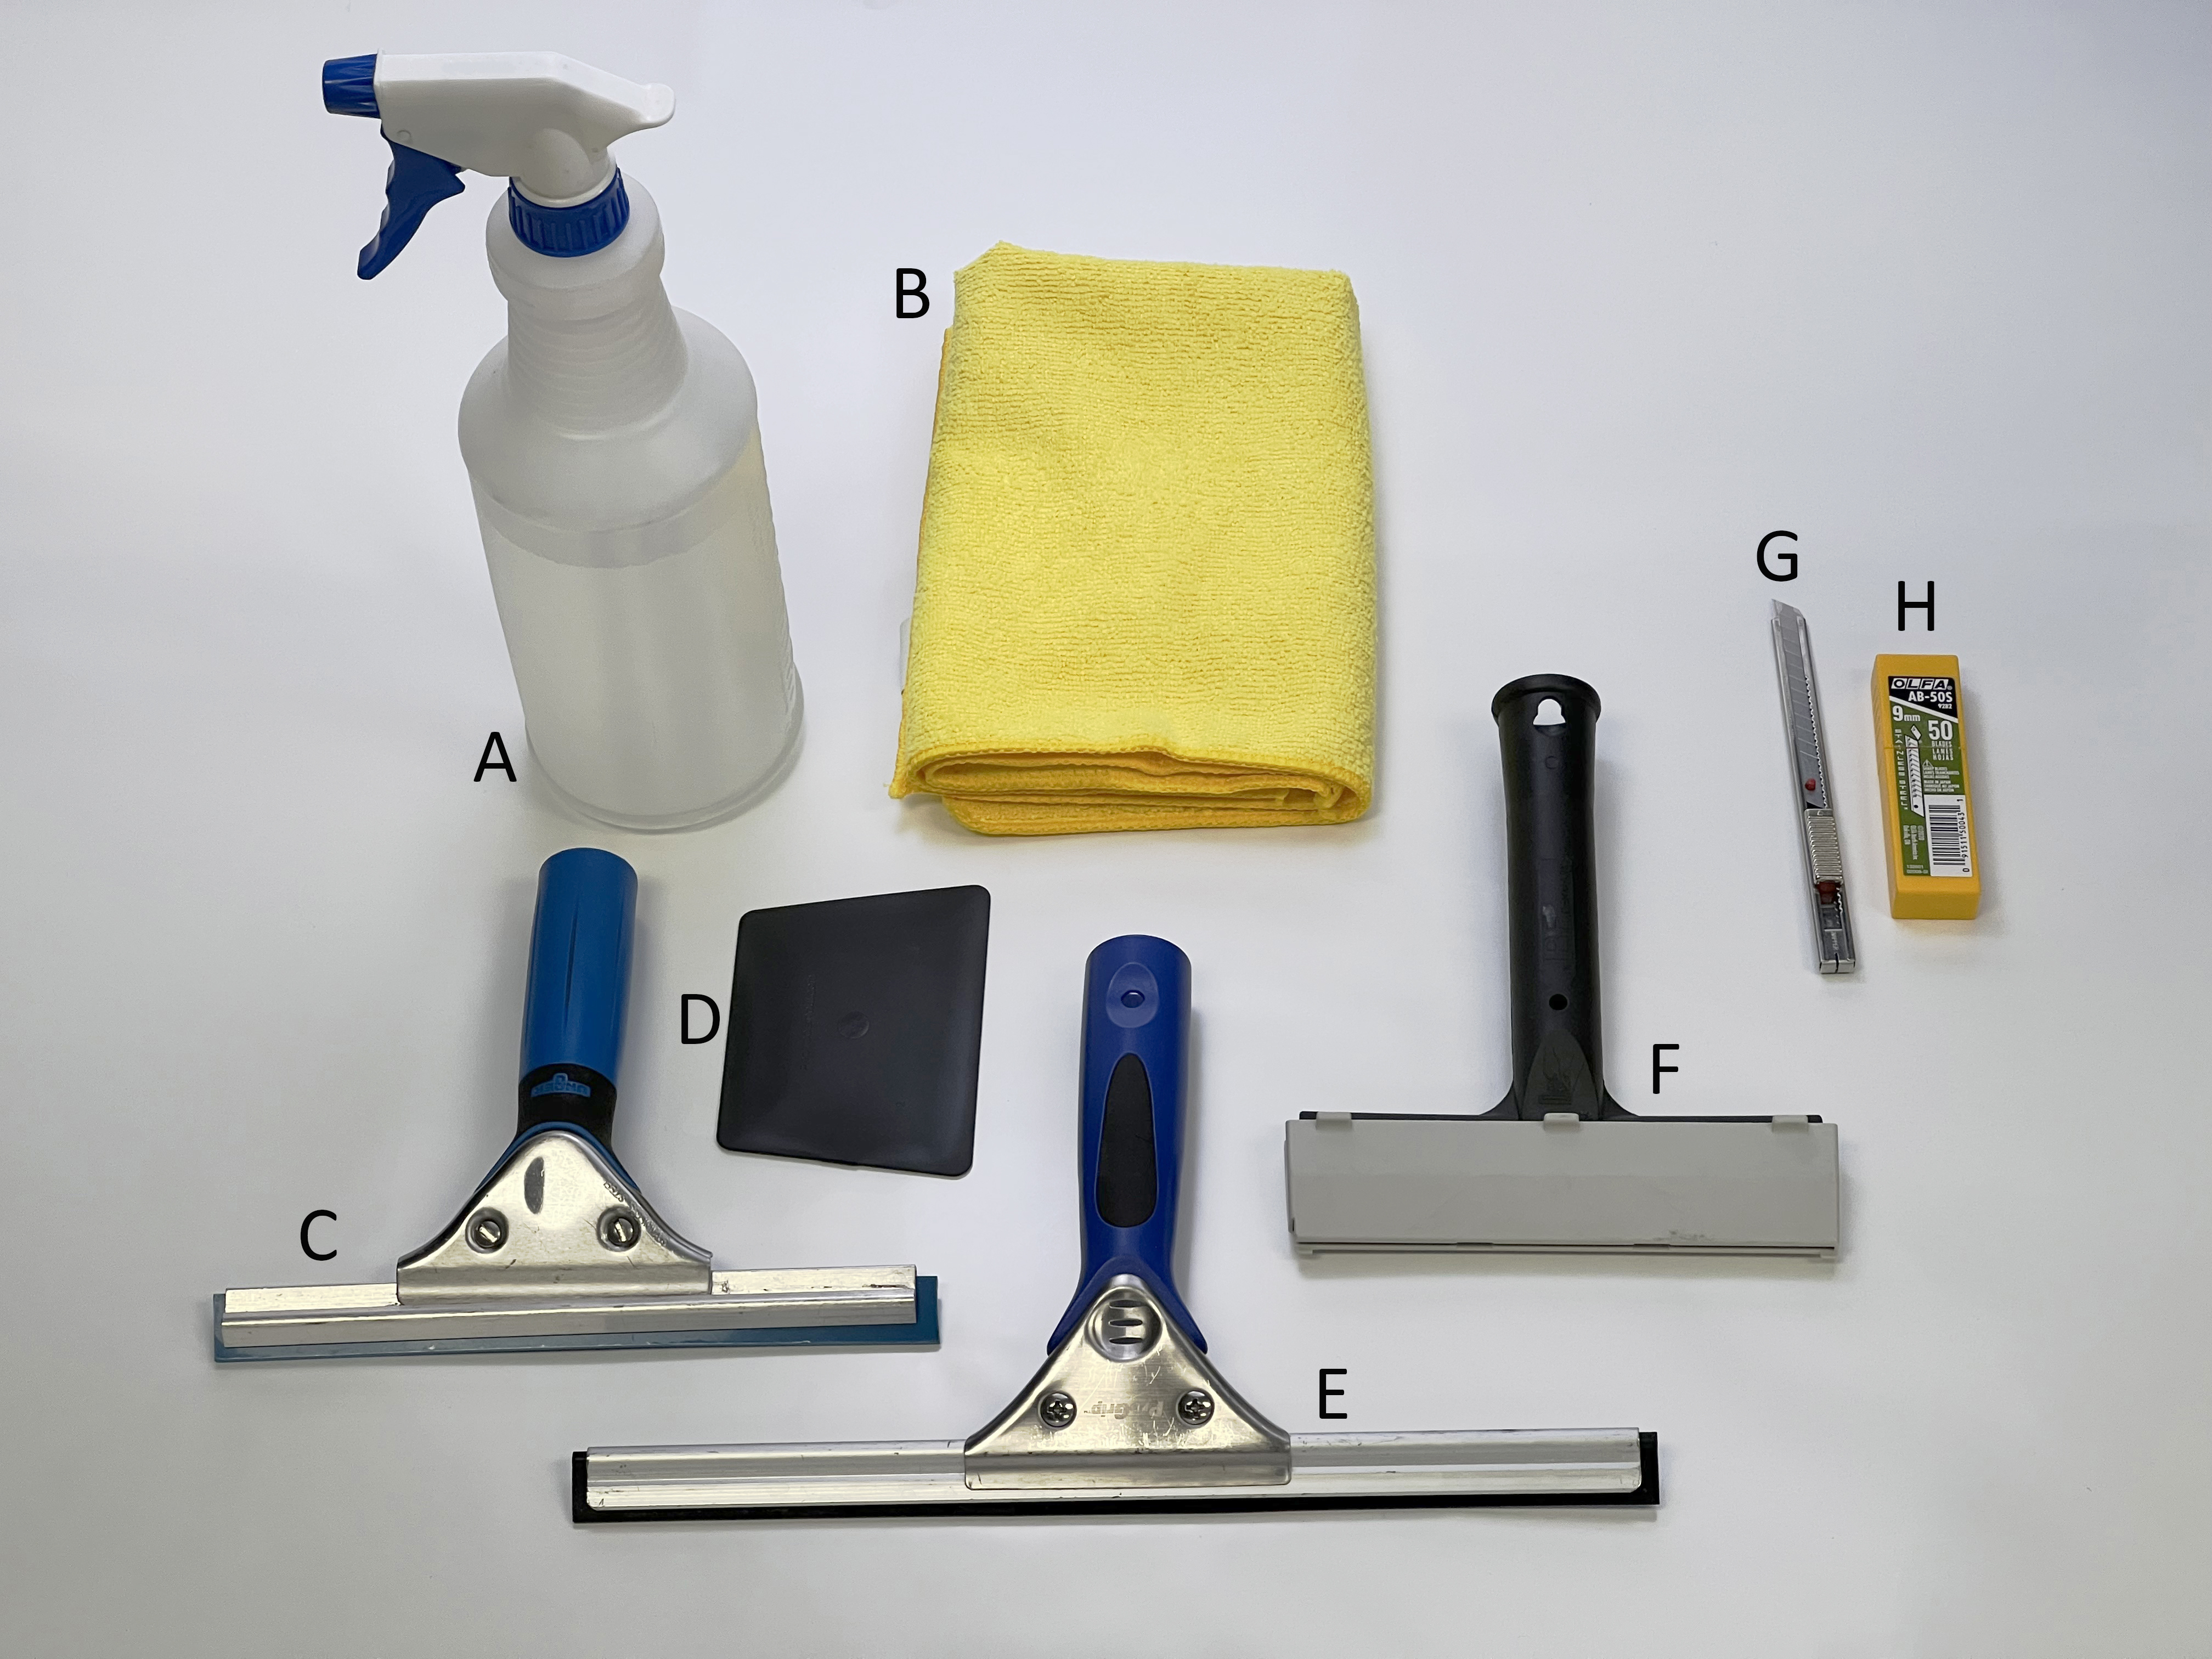
Recommended Tools
(A) 16oz Spray bottle
(B) Microfiber lint-free towel
(C) 8” Window Squeegee “hard rubber”
(D) 4” Plastic card (substitute with old credit card
(E) 12” Bathroom cleaning squeegee
(F) 6” Scraping Blade with holder (substitute with 1” single edge blade with /holder)
(G) Red dot Olfa utility knife (substitute with multipurpose utility knife)
(H) Extra blades for utility knife (trim tint with a fresh blade)
Thank you for choosing Kaholo Glass Art! If you’re choosing to install the artwork yourself, please follow the step-by-step DIY installation guide for a quick and efficient application.
Note: Your Kaholo Glass Art has a clear protective liner on one side to protect the adhesive system that will need to be removed – more detail below.
Easy 5-Step Installation Instructions for Your Kaholo Glass Art:
- BEFORE YOU START:
- Protect your floors:
- Make sure to cover the floor adjacent to your work area with an absorbent drop cloth or beach towel to protect your floors and soak up any excess mounting solution during the application.
- Confirm Your Design:
- Open the box that your Kaholo Glass Art came in and unroll the pattern from the plastic core.
- It’s best to layout your print(s) on a clean, dry surface such as a table.
- Next, confirm you have the correct pattern, overlay, orientation, and design size for your glass. Kaholo’s design sizes come in several varying sizes per design, requiring you to order a size that is slightly larger than your finished glass.
- If all is good, continue to the next step
- Protect your floors:
- Preparation / Cleaning and Mounting Solution and Window Prep:
- In a med-large spray bottle(A), add 4-5 drops of baby shampoo (for every 16 ounces of water) and shake well. This will be both your glass cleaning and film mounting solution.
- Spray the solution onto the window to be tinted and clean the glass thoroughly from edge to edge using a brand new single-edged scraping blade (F)(in a safe handle), not missing any part of the glass
- Use repetitive strokes and meticulous care in cleaning, especially at the window’s edges, always keeping the glass wet using the solution.
- Get the glass to be completely “flat” and free of any dried paint specs or debris on the glass as that will show up as an air bubble after installation.
- Once the entire glass surface has been scraped clean, spray the entire glass with the solution again, and wipe the edges dry with a clean, lint-free microfiber towel(B).
- Once your border is dry and lint-free, using a rubber squeegee(E), squeegee the window dry making sure not to leave any streaks.
- Wipe the 4 edges again with your lint-free microfiber towel
- Removing the Liner:
- We recommend the use of a large table (or a second person to hold the film) when removing the clear liner for installation.
- If using a table, lay the print side down with the clear (liner side) facing up.
- To separate the protective liner from the design, use two pieces of scotch tape, go to any corner of the design and place one piece of tape on the design side and another piece of tape on the clear liner side.
- Carefully and slowly pull apart the two pieces of tape until the liner releases from the design exposing the adhesive.
- The same method can be used when using a second person except one person can hold the film off the ground while the other person removes the liner.
- DO NOT TOUCH THE ADHESIVE OR ALLOW IT TO COME IN CONTACT WITH ANY OTHER SURFACE OR THING.
- IMPORTANT: Once the liner is removed IMMEDIATELY thoroughly spray till completely wet with a solution on both the glass surface and the exposed adhesive on the backside of the design.
- Positioning, Application, and Trimming:
- Next, transfer the design to the surface of the glass allowing nothing to come into contact with the adhesive side of the design
- Position the pattern to the desired location on the glass, making sure the pattern (or film) covers the entire glass surface from edge to edge.
- The film should be able to easily slide across the surface of the glass. Once the pattern is in position, wet the exterior surface of the print (the surface now facing you), and using your squeegee (C)lock down the film by squeezing the pattern from the center out to each edge using a “t” stroke pattern (center out- left and right, then center to top, center to bottom).
- Continue to squeegee and push out any and all excess water using overlapping squeegee passes.
- Once the entire design has been squeegeed it’s now time to trim off the excess material.
- To trim the film efficiently you will need a hard-plastic card (D)and a very sharp, new razor cutting knife(G).
- We recommend either Xacto #11 hobby knives or Olfa break-away blade knives.
- The hard card will help keep the film flat allowing the razor to make a nice straight clean cut.
- Using the frame of the window as a guide, run the hard card against the edge of the glass frame followed by the razor cutting knife.
- Final Inspection
- Once the design has been trimmed to fit the window exactly, use your hard card wrapped a lint-free towel (D)+ (B)to push out any solution on the edge of the print – allowing time on the edge for the cloth to absorb the moisture.
- This will prevent excess water from the frame to be pulled back under the design.
- Finally, using another dry microfiber towel(B), gently wipe down your design and excess water droplets.
- Take a final inspection from the outside of the window(s) looking for any trapped particles or air bubbles and push those out using your hard card wrapped in the towel(D)+ (B).
- Depending on the ambient temperatures of your locale and weather conditions allow 30-60 days for the film to fully dry.